Each location can be selected either for including for the search or for omitting from it.

 View example
Mapping
The Mapping feature is an advanced visual decision tool based on Google technology using which you can search for leads within one or several locations you have created on a map.
With the Mapping feature, you can:
• Define various geographical locations for adding to the search or excluding from it.
• See your target area on a digital map and make corrections on the fly.
There are certain limitations to the use of the Mapping feature:
• Mapping cannot be combined with other geographical selections. Other geographical selections become unavailable as soon as you save your Mapping location in the search.
• Granularity levels cannot be adjusted manually like for the Multi-Location Radius. The optimal granularity is selected for the count automatically. For more information on the granularity levels, see Granularity.
For searches created with Mapping, image of the map with the search geography is saved, and you can view it afterwards in the attachment to the e-mail with the count report for the search, or in the search details through the list of previous searches. For more information, see Previous Searches.
The following types of locations can be created on the map:
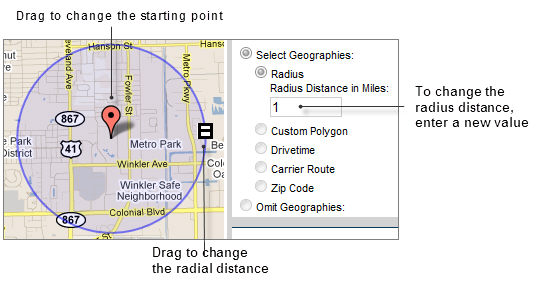
• Radius. You can specify the starting point (also known as “centorid”) and set the radial distance around the centroid.
• Custom Polygon. You can draw a custom polygon on the map through the interface.
• Drivetime. You can specify the starting point and the distance from it a car passes within the specified period of time.
• Carrier Route. You can select one or several Carrier Route areas on the map.
• ZIP Code. You can select one or several ZIP code areas on the map.
It is possible to combine various types of locations in one count. For example, you can combine a drivetime area and several ZIP code areas in one search.
Each location can be selected either for including for the search or for omitting from it. View example
The Mapping feature uses the Google Maps interface with regular navigation means.
You can navigate the map and adjust its look in a number of ways:
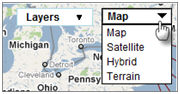
• To switch between a regular street map, satellite image, satellite image with street map, or street map with terrain, select the appropriate view from the Map list. View example
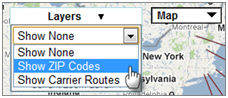
• To view the outlines of ZIP codes or Carrier Routes, select the appropriate option in the Layers list. View example
Outlines are only visible at zoom levels of 10 or greater.
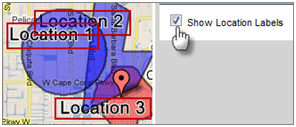
• To hide the location labels, clear the Show Location Labels text box. View example
• To view the adjacent territories, click and drag the map, or click the navigation arrows in the upper-left corner of the map.
• To zoom in and out, double left-click and double right-click, use the scroll wheel on your mouse, or the zoom slider in the left part of the map.
• To pan and zoom, you can also use the keyboard shortcuts: pan with arrow keys; pan wider with the PAGE UP, PAGE DOWN, HOME and END keys; zoom in and out with the plus (+) and minus (-) keys.
1 Zoom to the Location. You have the following options:
• On the right pane, enter a state, city, ZIP code, or street address in any combination, and click Go. Select the most appropriate location from the list.
• Click the area of the map you are interested in.
2 Select one of the following options:
• Select Geographies. Use this option to include the records from the specified location in your count. Locations to be included are displayed in blue.
• Omit Geographies. Use this option to exclude the records from the specified location from your count. Locations to be excluded are displayed in red.
3 Select the type of location. You have the following options:
• Radius. Specify the radius distance in miles.
The maximum radial distance is 200 miles.
• Custom Polygon
• Drivetime. Specify the drivetime in minutes.
The drivetime must be set between 2 and 120 minutes.
• Carrier Route
• ZIP Code
4 Click Create.
5 In a dialog box, accept the default location name or enter your own, and click OK.
6 Do one of the following depending on the location type:
• For the Radius location, proceed to step 7.
• For the Custom Polygon location, draw the polygon outlines by clicking on the map. To close the polygon, click the point where you started.
• For the Drivetime location, proceed to step 7.
• For the Carrier Route location, click Carrier Route areas on the map to add them to your location.
• For the ZIP Code location, click ZIP code areas on the map to add them to your location.
7 Edit the location, if necessary. For more information, see step 2 of Edit Location.
8 Click Save.
1 In the Current Map Locations box, click Edit for the location to be edited.
2 Make the adjustments. You have the following options, depending on the location type:
• Radius.
To change the coordinates of the starting point and the radial distance, drag the corresponding markers or enter a new value in the Radius Distance in Miles textbox. View example
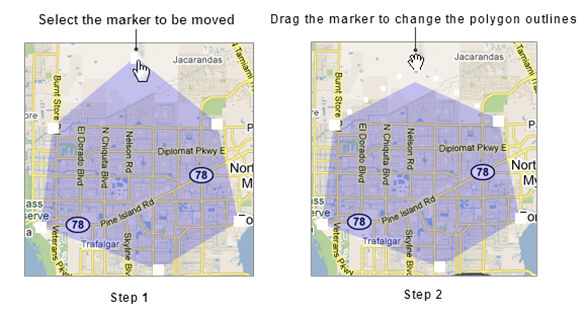
• Custom Polygon.
To change the custom polygon outlines, drag the corresponding markers. View example
• Drivetime.
To change the coordinates of the starting point, drag the marker.
To change the driving minutes, enter a new value in the Drive time in Minutes textbox. View example
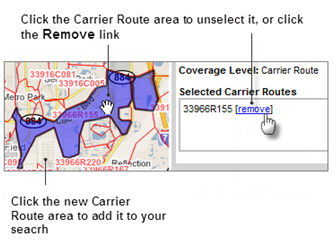
• Carrier Route.
To remove the Carrier Route selection, click the area to be unselected on the map, or click the Remove link in the Selected Carrier Routes box.
To add a new Carrier Route, click the corresponding area on the map. View example
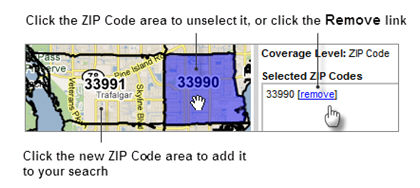
• ZIP Code.
To remove the ZIP Code selection, click the area to be unselected on the map, or click the Remove link in the Selected ZIP Codes box.
To add a new ZIP Code, click the corresponding area on the map. View example
1 In the Current Map Locations box, click Del for the location to be deleted.
2 Confirm the deletion by clicking OK.
Location priority affects distribution of records between overlapping locations. If an address is situated within boundaries of two locations at the same time, the system assignes it to the location with higher priority. For more information on the logic used in the Mapping feature, see Mapping Logic.
Changing location priority does not affect the total for the count.
To change the location priority, do the following in the Current Map Locations box:
• To raise the location priority, click the plus sign for the appropriate location.
• To lower the location priority, click the minus sign for the appropriate location.